Development VPN Life: Server Hardening
Last week I started talking about VPNs. Instead of talking about the steps to set one up, I talked about what VPNs were and weren’t, and I digressed a lot. Let’s get back on track. Namely this track:
Harden the server, continue to harden the server, setup the VPN, test the VPN, sleep like a baby wearing a privacy Snuggie wrapped in a blanket of encryption.
Let’s talk about server hardening… Oh, and before I start, ‘server hardening’ refers to improving the security on a server. Not much of a surprise.
I want to get a bit more hands on in this post, so I’m going to talk about the exact steps you should be doing before setting up your server.
Build a Server
There are many ways to do this, but as always, I recommend using Digital Ocean. Here is my referral link to get 2 months hosting free!
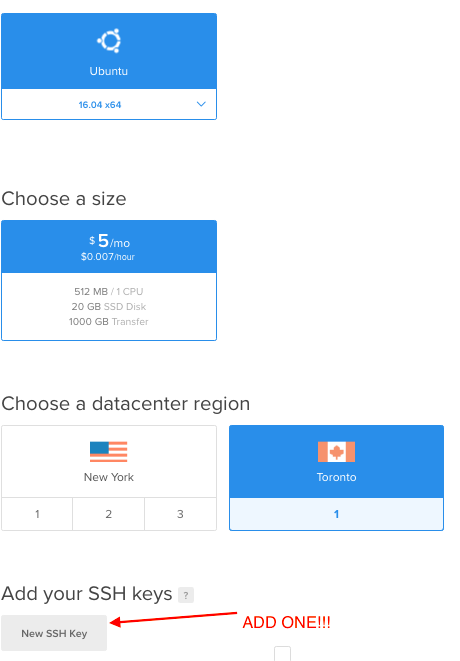
Use this tutorial if you’ve never created a DO droplet before, but it’s pretty simple and only takes about a minute.
My default settings are Ubuntu 16.04 LTS, a $5/month server (more than enough quite often), and setup in either New York or Toronto (e.g. close to me). Oh, and you know that SSH key thing? USE IT!!! Don’t use password-based authentication, even ‘just to get started’. Create an SSH key, put it into Digital Ocean, and always, always, always use it. That’s Step 0 of server hardening.
Once it’s ready to go, ssh in (you know, using that fancy SSH key you created) and run through the following.
P.S. I’m assuming you’ve logged in as root.
P.P.S. I thought about making this into a set of Ansible scripts, but they end up taking me longer to make and debug, than it does to write a one-off script… Also, I wanted all of these steps to be explicitly viewed and analyzed before being run… I don’t want to hide or obfuscate anything in this process.
Basic Maintenance
This is the most basic of the basic. Make sure your system is up-to-date with the latest packages, distributions, and hotfixes.
apt-get -y update
apt-get -y upgrade
apt-get -y dist-upgrade
apt-get -y autoremove
apt-get -y autoclean
Enable Automatic Updates
There are occasional downsides of updating frequently from a stability point-of-view, but from a security point-of-view, it’s usually good to stay on top of things. Besides, if you’re making a VPN server, how often will you remember to log in and perform updates? If this server is doing it’s job well, you should never need to log in.
We’re going to use the unattended-upgrades and the update-notifier packages, as well as allow for automatic server reboots (otherwise, what’s the point? You might download some patches, but they might never get applied).
For clarity, I’ve avoided a regex and am using a full sentence sed below. It goes back to my point of clarity. I’m not looking for this to be elegant or programmatically slick, I want every single line to make sense for the average user.
apt-get install -y unattended-upgrades update-notifier-common
dpkg-reconfigure -plow unattended-upgrades ## Ironically, unattended upgrades has a GUI interface

sed -i 's|//Unattended-Upgrade::Automatic-Reboot "false";|Unattended-Upgrade::Automatic-Reboot "true";|' /etc/apt/apt.conf.d/50unattended-upgrades
Setup a Root Password
It’s arguable whether this is even necessary, since we won’t be able to ssh in as root, but I’ve just always done it.
ROOT_PASSWORD=some-crazy-ridiculously-long-password-that-makes-no-sense-to-anyone
echo "root:$ROOT_PASSWORD" | chpasswd
Create a sudo User
This is the prototypical step. We’re going to create our user, give that user sudo access, and use that user to ssh in and basically use the server in it’s entirety.
NEW_USER=myusername
NEW_USER_PASSWORD=mypassword
adduser $NEW_USER --gecos "First Last,RoomNumber,WorkPhone,HomePhone" --disabled-password
usermod -a -G sudo $NEW_USER
Whatever you do, don’t logout yet - you need to setup this user to login.
Transfer SSH Credentials
Let’s pull over those fancy SSH keys you created the server with to this new user. We need to remember to change the ownership of them, otherwise you’ll be stuck.
cp -R ~/.ssh/ /home/$NEW_USER/
chown -R $NEW_USER:$NEW_USER /home/$NEW_USER/.ssh
Configure SSHD
Let’s lock down the SSH side of things. As before, I’m doing a blatently obvious sed so that it’s very clear what I’m doing. In short, I’m reducing the login time, disallowing the root user to ssh in (this is the most common brute force server attack I’ve seen), and explicitly disallowing password authentication at all on the server (again, to prevent brute force ssh logins).
sed -i "s/LoginGraceTime 120/LoginGraceTime 60/" /etc/ssh/sshd_config
sed -i "s/PermitRootLogin yes/PermitRootLogin no/" /etc/ssh/sshd_config
sed -i "s/#PasswordAuthentication yes/PasswordAuthentication no/" /etc/ssh/sshd_config
However, you can’t just stop there, I’m also only allowing ONE username to attempt to log in (and it will only log in using ssh keys).
echo "AllowUsers $NEW_USER" >> /etc/ssh/sshd_config
For this to take effect, you need to restart your ssh daemon.
service ssh restart
Check for Rootkits
This is something that I’m as guilty as sin about skipping on other server installations (and most people I know skip them too). As it is, it’s pretty hard to get a rootkits on a locked down server in the first place - but it’s such a small amount of effort to check for them, that you may as well.
I’m going to install and run 2 rootkit checkers and don’t worry, they don’t interfere with each other.
apt-get install -y rkhunter chkrootkit
chkrootkit
rkhunter --update
rkhunter --propupd
rkhunter --check
Since this is a brand new server, they won’t show any problems, but it’s still a good idea to run them to get a feel for how long they take, and the output they show.
Running them once is pretty useless though, eh? Don’t worry, next post, I’ll show you how to automate them to run nightly/weekly. Cough cron Cough (though that’s not the only way).
Run a Security Audit
Last up for today, we’re going to run through a security audit on the work we’ve done so far. There are a few tools for doing this kind of audit - and some of those tools actually go in and automatically fix certain ‘problems’ for you. Since each server/flavour is different, you need to make sure the tool you’re using is targeted for your distro and set of installed tools.
One tool I really want to get up to speed with is OpenSCAP - as I definitely see value in it, but until I can really dig through the various profiles, guides, and code - I don’t want to just start using it.
Instead, I’m going to use Lynis to perform a security audit (it’s like a more recent incarnation of Tiger). Make sure to perform the audit as root to ensure all the appropriate tests are run.
wget https://cisofy.com/files/lynis-2.2.0.tar.gz
tar -xvzf lynis-2.2.0.tar.gz
cd lynis
./lynis audit system
What’s really interesting is that even after the work that we’ve done so far, we only score around a 70. That’s still well above what the typical accessible server is at, but nonetheless, it’s not good enough.
There are a few freebies in that audit list that I intentionally left off this first pass. I want to do a shallow dive into them next week, because they’re the kinda ‘security gaps’ that make me wonder how well these security audit tools actually work.
Next Time
Sorry, but next week, we still won’t be setting up the VPN… We’re not done hardening your server and automating a few more things. But I promise that the week after next, we’ll setup a VPN.