Mobile 4 Methods of Debugging Android Apps
If debugging is the process of removing software bugs, then programming must be the process of putting them in. - Edsger Dijkstra
Debugging server or desktop apps is pretty trivial. In your preferred IDE, you literally press ‘debug’ and just break through code as it runs. The same can be said for mobile apps inside of a simulator.
As you move into the physical world, things get marginally trickier because you now need a physical mobile device, and a cable.
Now, what happens when you want to go off-script and do something crazy, like debug your mobile app WITHOUT a physical cable? …Well… Read on my friend.
Wired debugging
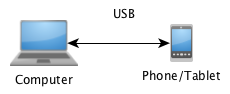
This is the vanilla way that every ol’ developer sets up their development environment. First, turn on developer mode, then plug into your computer. Once you accept the appropriate keys, you’re good to launch/debug your app through Android Studio or over ADB directly.
How boring.
Wireless Debugging
If you’re like me, regular wired debugging can’t be used all the time.
Wondering what makes me so special? Lots of things… Or so my mom says.
The real reason I struggle with wired debugging is because a lot of the apps I write involve some amount of USB communication (e.g. USB OTG so a tablet can talk to a sensor or custom hardware board). Hopefully the problem has become painfully obvious, but if not… The vast majority (but not all) of Android phones/tablets only have a single USB port. If you’re lucky, you’ll have a 2 USB port device, but don’t count on it.
This means that if you want to have any chance of debugging, you’ll need to use one of the following three methods to debug your device without using a cable. Note, wired is usually the fastest way to install and debug your apps - so use it if/when you can.
Full disclosure: Okay, so… In all honesty, sometimes I use remote debugging when my device is in another room and I’m too lazy to get up and get it - and I only need to run tests or I’m playing around with BLE scanning/advertising… In those cases, I can just check out the console log and don’t need to interact with the screen. Actually, I change my mind - I call that ‘efficient’, not ‘lazy’…
Home WiFi Network
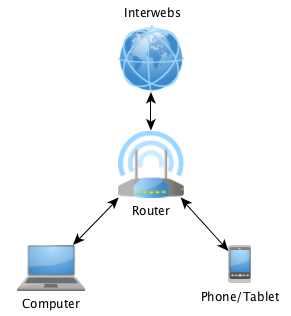
The most normal method of wireless debugging happens when your computer and Android device are on your home network, both with internet access, and connected to each other over your local router.
The following instructions are the same as the commands you’ll need in the following steps as well, so refer back to here. There are some other methods, and even some apps to do this - however, they sometimes require root… This can be done on a vanilla Android device.
With your Android device connected to your computer over USB, find your ‘adb’ executable (usually in Android/sdk/platform-tools):
adb tcpip 5555
adb connect WWW.XXX.YYY.ZZZ:5555
Where the IP address to connect to is discovered via:
adb shell ip -f inet addr show wlan0
Alternatively, you can check the correct IP address from Android’s advanced WiFi settings - but that takes marginally more time.
If you ever need to return to regular USB mode, just use:
adb usb
Isolated Router
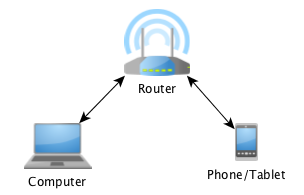
I refer to the previous method as the “Home WiFi Network” method, because that’s the typical case where the necessary ports are open - and the speed of interaction will be up to par. If you’re on your company network, or on the guest network of a client - quite often they lock down non-80/443 ports, and if nothing else - the speed is horrendous. This can also apply to working out of a Starbucks, Second Cup, or similar.
One method I like to employ is to bring my own WiFi router, as I have a couple sitting around. You connect to that router the exact same way that you would connect to any WiFi network (both on your computer and Android device), and run the exact same commands shown above.
A large downside is that you don’t have internet access on this router, so be sure to do all your Gradle synching while you’re connected to the internet, and use the isolated router to upload non-Gradle changes, and to debug.
An amusing upside is that if you sit in a coffee shop with one of these on your table, people look at you like you’re some sort of crazed hacker (or, the Mad Hacker - if you prefer).
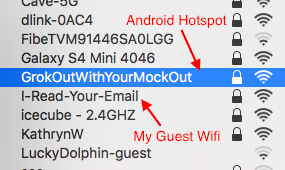
Hotspot initiated by Android
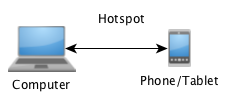
In this final method, you create a hotspot/adhoc network on one of your devices, that the other device connects to. I originally tried to do this from my computer, but it appears that some Android devices have a hard time connecting to AdHoc networks.
So, what I do now is to flip it, so that Android creates the hotspot (irrelevant if you have internet connectivity or not).
And then I connect to it from my computer.
Then follow the same adb instructions as above.
This is the simplest solution, and requires carrying around the least amount of stuff - you just need to ensure you can create a hotspot using your mobile device.
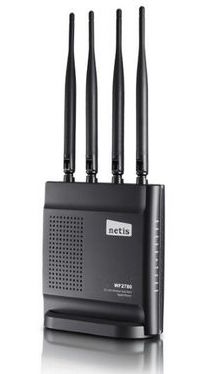
Feature Photo credit: Franz & P / Foter / CC BY-NC-SA